Welcome to a new Craft Card making Challenge!
The winners of our last challenge are at the bottom of this post!
Challenge theme:
ANYTHING GOES
Enter the Craft Card making Challenge competition following the instructions at the end of this post and you could win a prize - we make it random so everyone has a chance to win whether you're a beginner or not!
Enter anything you wish if it's handmade by you.
All the challenge details and how to enter are below!
Let's see the inspiration from the team - we've been creating lots of gorgeous ideas for you...
Wow!! Lots of gorgeous inspiration for you this week to use - we hope you'll share what you make with your Polkadoodles products on our Social Media!
So, just a reminder....the challenge theme is
ANYTHING GOES
We have Random prizes which means it's a really fair competition and ANYONE can win (regardless of how great a crafter you are) so there's nothing to lose, just follow the instructions on how to enter at the bottom of the blog and use the Linky section to upload your projects.
Enter anything you wish if it's handmade by you.
All the challenge details and how to enter are below!
We are sponsored by Polkadoodles, Check out the latest Polkadoodles releases & SHOP HERE...
Let's see the inspiration from the team - we've been creating lots of gorgeous ideas for you...
Pam - I selected Polkadoodles Lilac Haze Watercoloured Flowers. and made bright bold red flowers with monochromatic leaves that coordinated with the background paper from the digital package. After adding the solid background matting, I cut the coordinating red cardstock to wrap around the card. Once the flaps were secured, I added the tiny die cut scalloped edging and then the sentiment in the center of the 'v' to complete the card design.


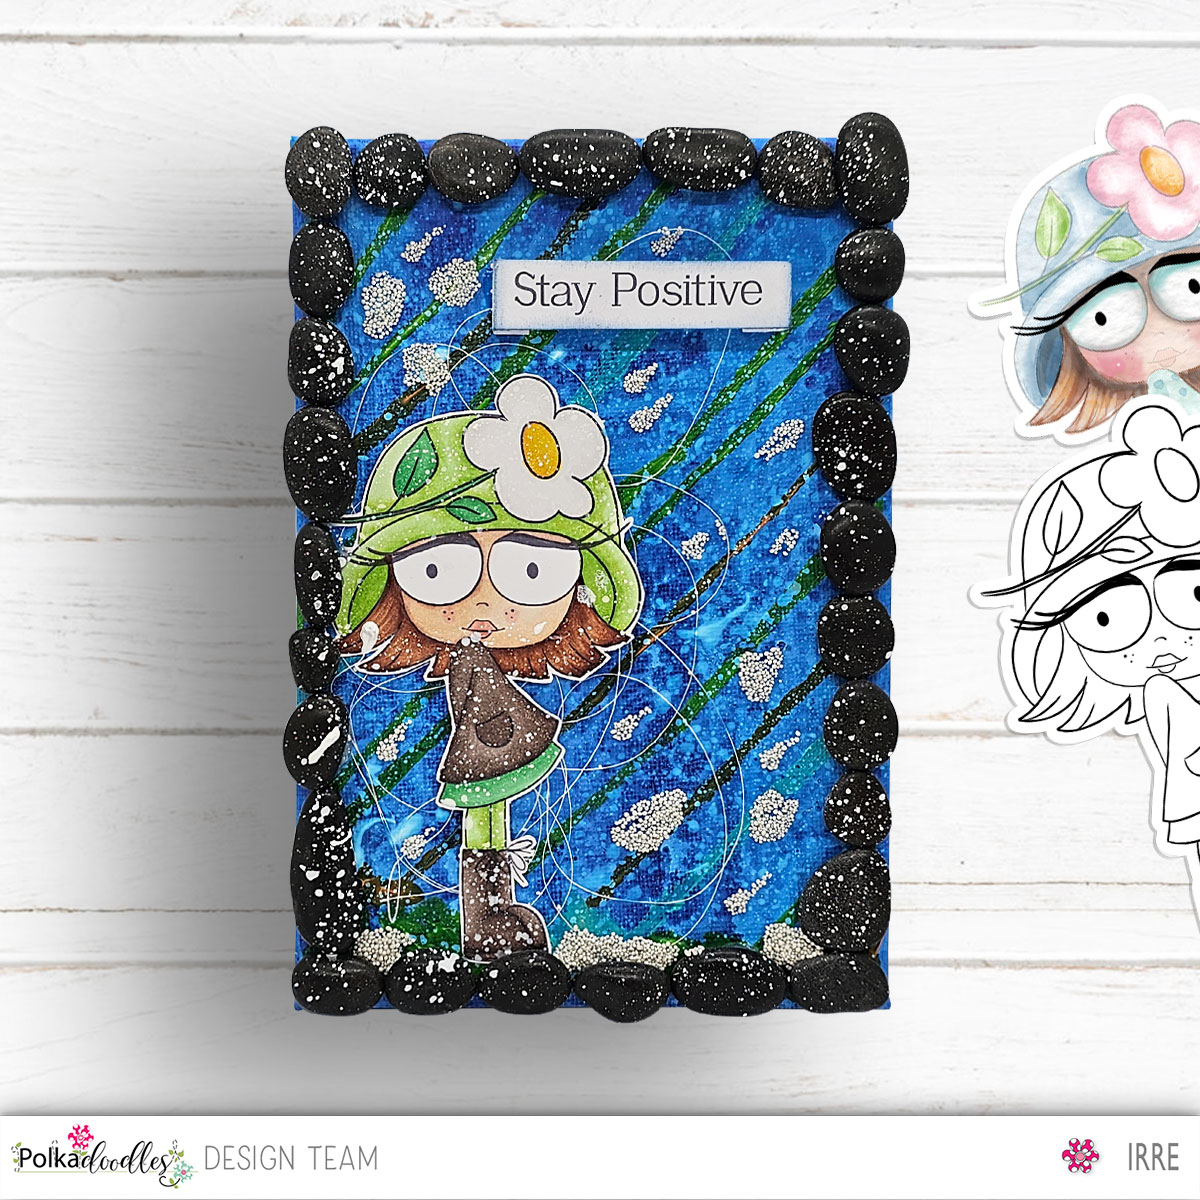
Merja - I've wanted to use this beautiful Natures Beauty Girl image ever since I saw it first time 💚 I wanted to try something different and do a little messy look so I chose to play with Ecoline Brush Pens and water - even though there were the change that the printer ink would start to spread. But it didn't spread so much, maybe because I printed the image few weeks ahead. It was a nice change for using something else than alcohol markers and I think that messy look fits perfectly with this image.

RACHAEL - Have you been asked to make some wedding cards, invitations, save the dates, or other table wear for a wedding? This clear stamp set called Wedding Season is perfect for making them. For this invitation, I used a gatefold design with a wraparound front, embellished with the stamps in the set. To make matching backing paper I used the tiny heart in the set to randomly stamp making perfect matching papers! simple but elegant!

Wendy L - I created this pop up box using precoloured digital stamps from the Perfect Peony collection - unusual for me not to color myself but sometimes you just need to make something different to the norm. Hope you like it!

Janelle: Hello crafty friends! Today I am sharing this super cute Bathtime Elephant. I just can't get over how sweet this one is and how fun it was to color!!
- Elephant: C00, 0, 1, 3
- Cheek/Ears: R01, R000
- Nails: W00, W0, 2
- Wooden Tub: W41, 42, 43
- Stool/shelf: E30, 31, 33
- Towel: BV 0000, 00, 02
- Shower head: T0, T2
- Bottles: B0000, 000, 01/ BG 10, 11,13
- Sponge: Y21, 23
- Water: B0000, 000, 01
- Bubbles: Y11, B000, BV00, RV02,

More gorgeous inspiration for you this week to use - we hope you'll share what you make with your Polkadoodles products on our Social Media!
So, just a reminder....the challenge theme is
ANYTHING GOES
We have Random prizes which means it's a really fair competition and ANYONE can win (regardless of how great a crafter you are) so there's nothing to lose, just follow the instructions on how to enter at the bottom of the blog and use the Linky section to upload your projects.
Winners from Challenge 14...
TO CLAIM YOUR PRIZE:EMAIL US WITH THE SKU & NAME AND/OR LINK OF THE THREE DIGITAL STAMPS (EXCLUDES BUNDLES) YOU WOULD LIKE TO RECEIVE. PLEASE EMAIL US HERE, QUOTING THE FOLLOWING CODE PDWK16001 TO CLAIM YOUR PRIZE.CLAIMS MUST BE RECEIVED BY 27/4/24.(PLEASE NOTE - WINNERS WILL RECEIVE A REPLY WITHIN 28 DAYS, PLEASE DO NOT KEEP EMAILING IF YOU DON'T RECEIVE A REPLY BACK DURING THIS TIME)
Top 3 favourite entries for this challenge are....
6 Irene
31 Mummylade
You won 1 digital stamp!
TO CLAIM YOUR PRIZE:EMAIL US WITH THE SKU & NAME AND/OR LINK OF THE THREE DIGITAL STAMPS (EXCLUDES BUNDLES) YOU WOULD LIKE TO RECEIVE. PLEASE EMAIL US HERE, QUOTING THE FOLLOWING CODE PDWK16123 TO CLAIM YOUR PRIZE.CLAIMS MUST BE RECEIVED BY 27/4/24.(PLEASE NOTE - WINNERS WILL RECEIVE A REPLY WITHIN 28 DAYS, PLEASE DO NOT KEEP EMAILING IF YOU DON'T RECEIVE A REPLY BACK DURING THIS TIME)
WE LOVED YOUR CRAFTY PROJECTS, THANKS SO MUCH TO EVERYONE FOR ENTERING!
Don't forget to join in our other challenges too -You could win more stash and as always our Challenges are **Anything Goes**
Click here to enter: Digi Choosday Blog
Click here to enter: Gem of a Challenge (starts today!)
Click here to enter: We Love 2 Create challenge
Check out the latest Polkadoodles releases & SHOP HERE...
TO CLAIM YOUR PRIZE:
EMAIL US WITH THE SKU & NAME AND/OR LINK OF THE THREE DIGITAL STAMPS (EXCLUDES BUNDLES) YOU WOULD LIKE TO RECEIVE. PLEASE EMAIL US HERE, QUOTING THE FOLLOWING CODE PDWK16001 TO CLAIM YOUR PRIZE.
CLAIMS MUST BE RECEIVED BY 27/4/24.
(PLEASE NOTE - WINNERS WILL RECEIVE A REPLY WITHIN 28 DAYS, PLEASE DO NOT KEEP EMAILING IF YOU DON'T RECEIVE A REPLY BACK DURING THIS TIME)
6 Irene
31 Mummylade
You won 1 digital stamp!
Don't forget to join in our other challenges too -You could win more stash and as always our Challenges are **Anything Goes**
Click here to enter: Digi Choosday Blog
Click here to enter: Gem of a Challenge (starts today!)
Click here to enter: We Love 2 Create challenge
TO CLAIM YOUR PRIZE:
EMAIL US WITH THE SKU & NAME AND/OR LINK OF THE THREE DIGITAL STAMPS (EXCLUDES BUNDLES) YOU WOULD LIKE TO RECEIVE. PLEASE EMAIL US HERE, QUOTING THE FOLLOWING CODE PDWK16123 TO CLAIM YOUR PRIZE.
CLAIMS MUST BE RECEIVED BY 27/4/24.
(PLEASE NOTE - WINNERS WILL RECEIVE A REPLY WITHIN 28 DAYS, PLEASE DO NOT KEEP EMAILING IF YOU DON'T RECEIVE A REPLY BACK DURING THIS TIME)
WE LOVED YOUR CRAFTY PROJECTS, THANKS SO MUCH TO EVERYONE FOR ENTERING!
Click here to enter: Digi Choosday Blog
Click here to enter: Gem of a Challenge (starts today!)
Click here to enter: We Love 2 Create challenge
Check out the latest Polkadoodles releases & SHOP HERE...